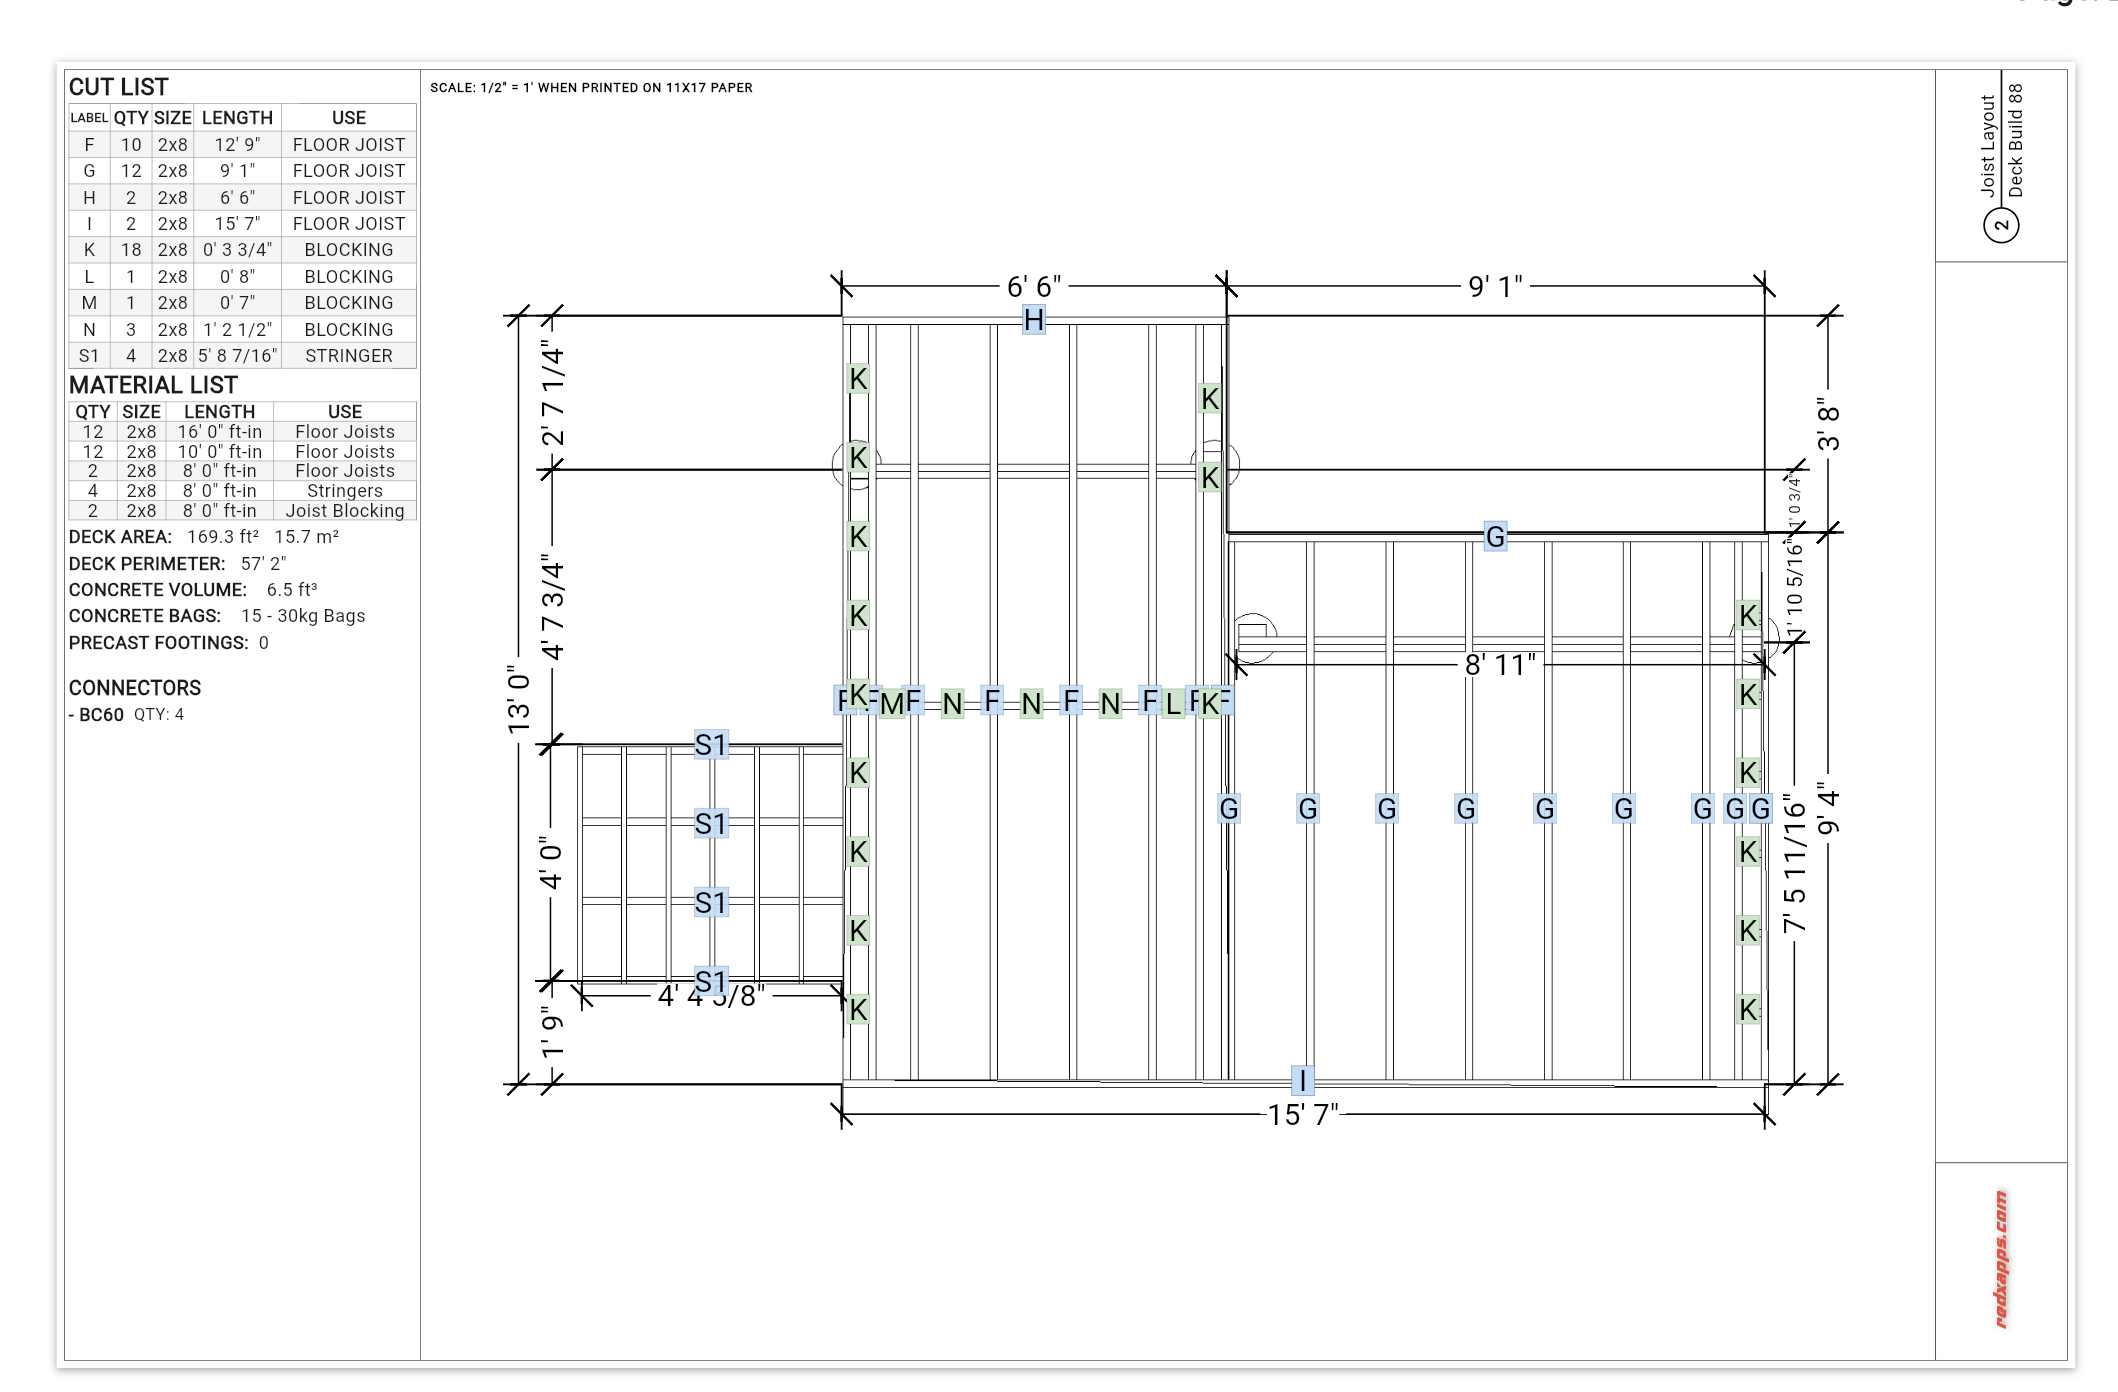
From RedX Decks App to SketchUp: Complete Workflow Guide
If you've ever tried building a deck from scratch in SketchUp, you know the pain. Manually modeling every joist, calculating spans, figuring out beam sizes. It's tedious work that eats up hours before you even get to the fun design stuff.
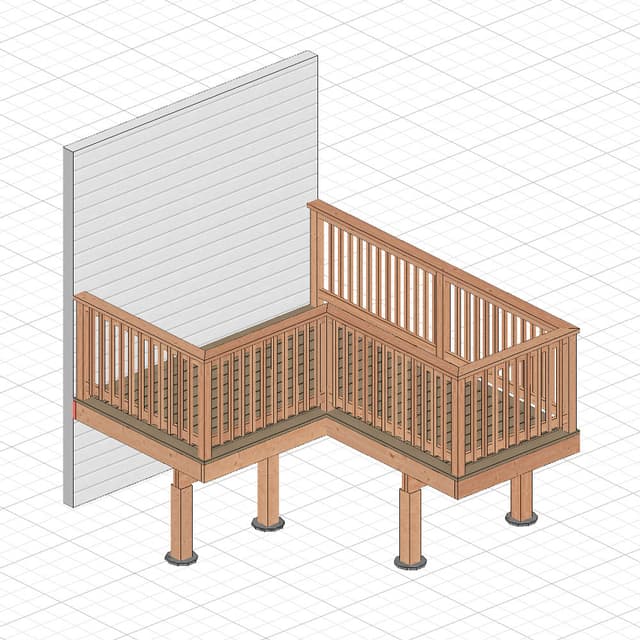
The RedX Decks app changes this game entirely. It handles all the structural heavy lifting automatically, then exports a complete 3D model you can bring into SketchUp for advanced modeling and professional blueprints.
This workflow is perfect whether you're a deck builder just getting into 3D modeling, a contractor looking to speed up your design process, or a DIY enthusiast who wants professional-quality plans without the headaches.
Why Building Decks in SketchUp is Usually a Pain
Let's be honest. Modeling a deck properly in SketchUp requires you to know:
- Structural basics: proper joist spacing, beam sizing, and post placement
- SketchUp skills: creating accurate lumber dimensions and clean geometry
- Building codes: ensuring railings, stairs, and framing meet local requirements
- Complex calculations: figuring out spans, loads, and material quantities
- Patience: placing hundreds of individual components by hand
Most people either skip the structural details (bad idea) or spend way too much time getting bogged down in framing minutes when they should be focusing on design.
1. Start Smart: Design Your Structure in RedX Decks
Instead of jumping straight into SketchUp, begin with the RedX Decks app to create your structural foundation:
Quick Layout Setup
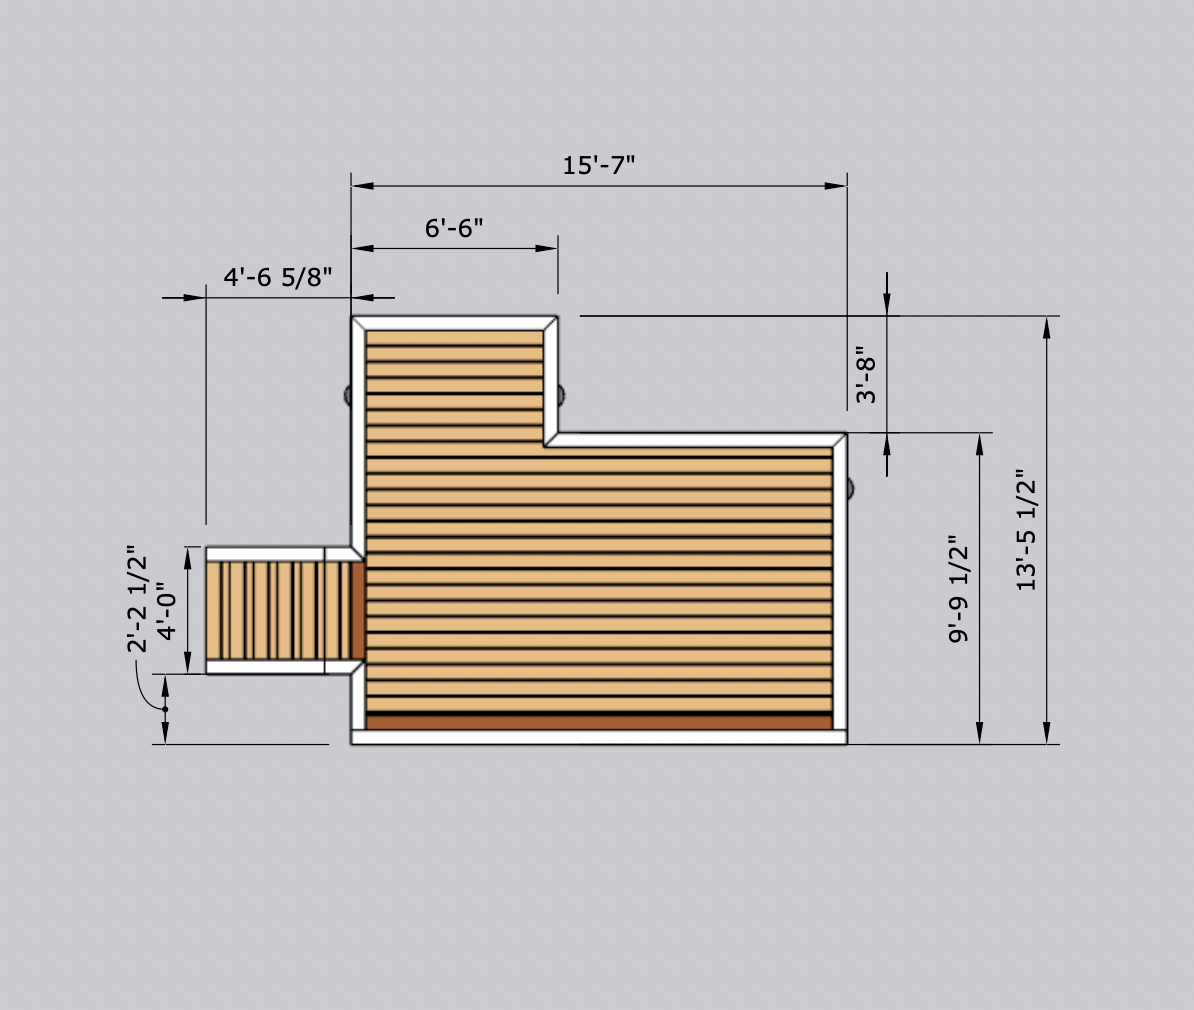
Set your deck size, choose your shape (rectangular, L-shaped, or custom), and specify multiple levels if needed. The app handles the math while you focus on the big picture.
Automatic Structural Design
Here's where the magic happens. RedX Decks automatically creates:
- Proper joist spacing (16" or 12" on center)
- Correctly sized beams based on your spans
- Foundation posts positioned for maximum strength
- Required blocking between joists
Code-Compliant Features
The app includes proper stair calculations, railing systems that meet code, ledger board details for attached decks, and material specifications. All the stuff that trips people up.
2. Get Your Materials List (The Easy Way)
Unlike manual SketchUp modeling where you're left guessing at quantities, RedX generates everything you need:
- Complete lumber list with exact board footage
- Cut list showing specific lengths for each piece
- Hardware requirements
- Concrete needs for footings
No more standing in the lumber yard trying to figure out how many 2x10s you actually need.
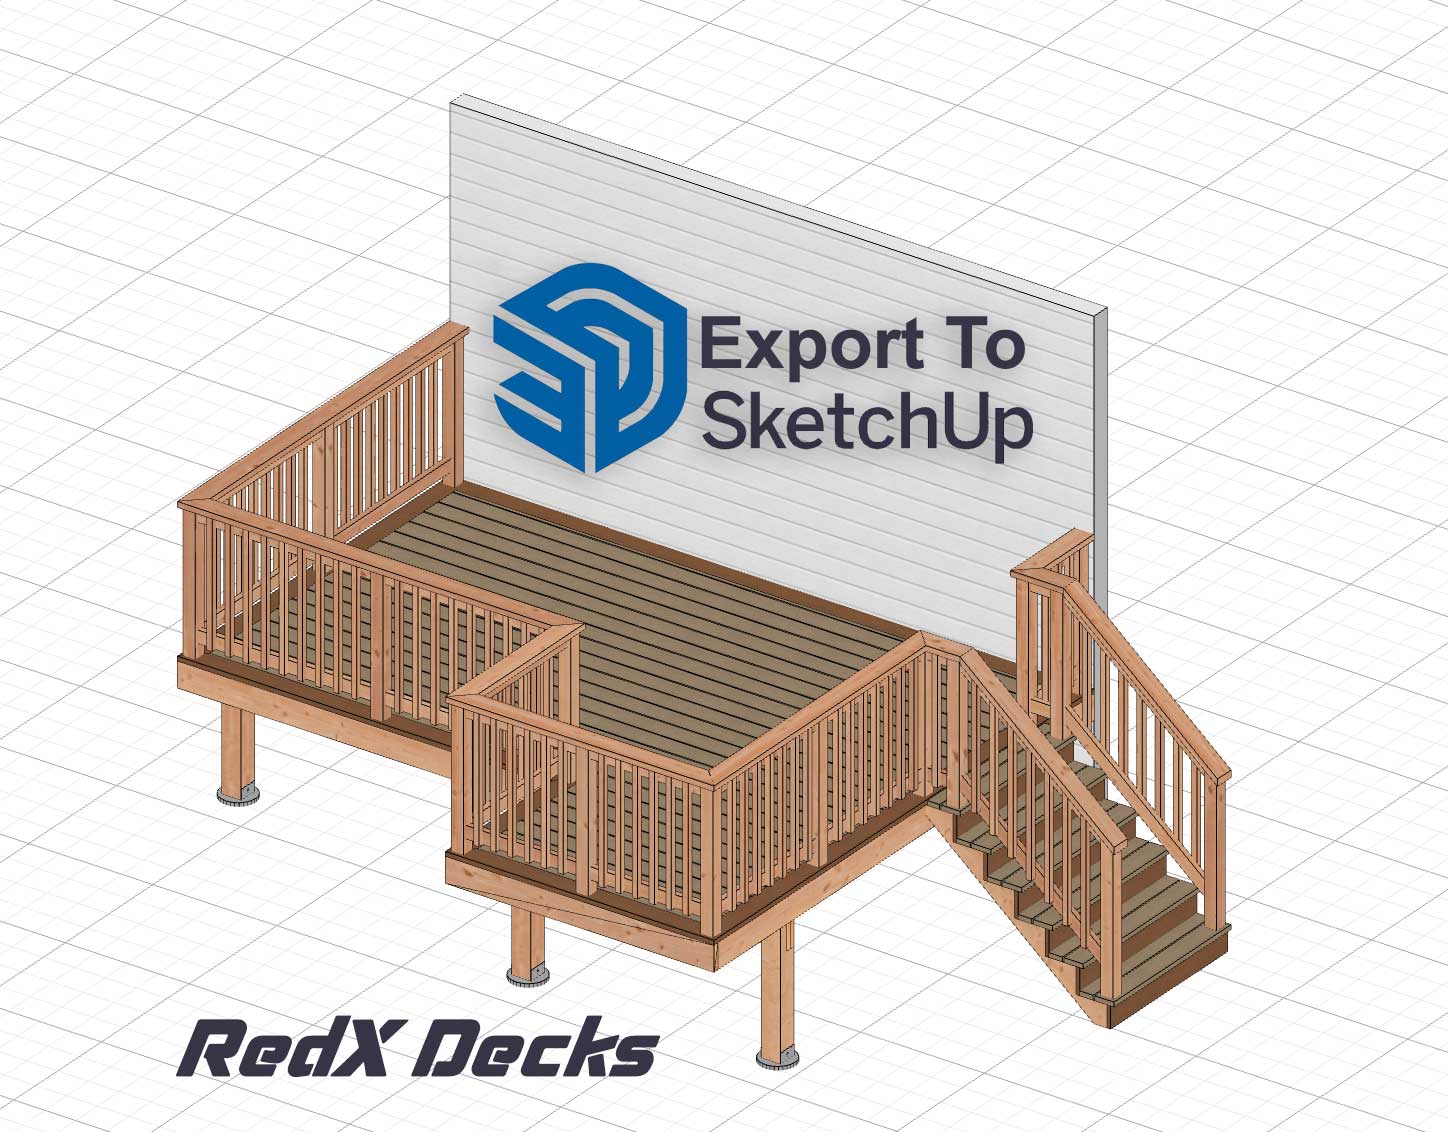
3. Export to SketchUp in One Click
Getting your design into SketchUp is surprisingly simple:
- Hit the Share button in RedX Decks
- Select "Export 3D Model" from the menu
- Choose DAE format (this plays nice with SketchUp and most other 3D software)
The export includes your complete deck with all framing, decking boards, and structural elements. Everything stays at accurate 1:1 scale, and parts are properly grouped for easy editing in SketchUp.
Why DAE Format Works Great
DAE (Digital Asset Exchange) files are a standard 3D format that keeps your geometry accurate, maintains material assignments, and preserves the organized structure of your model. It's like having a universal translator between apps.
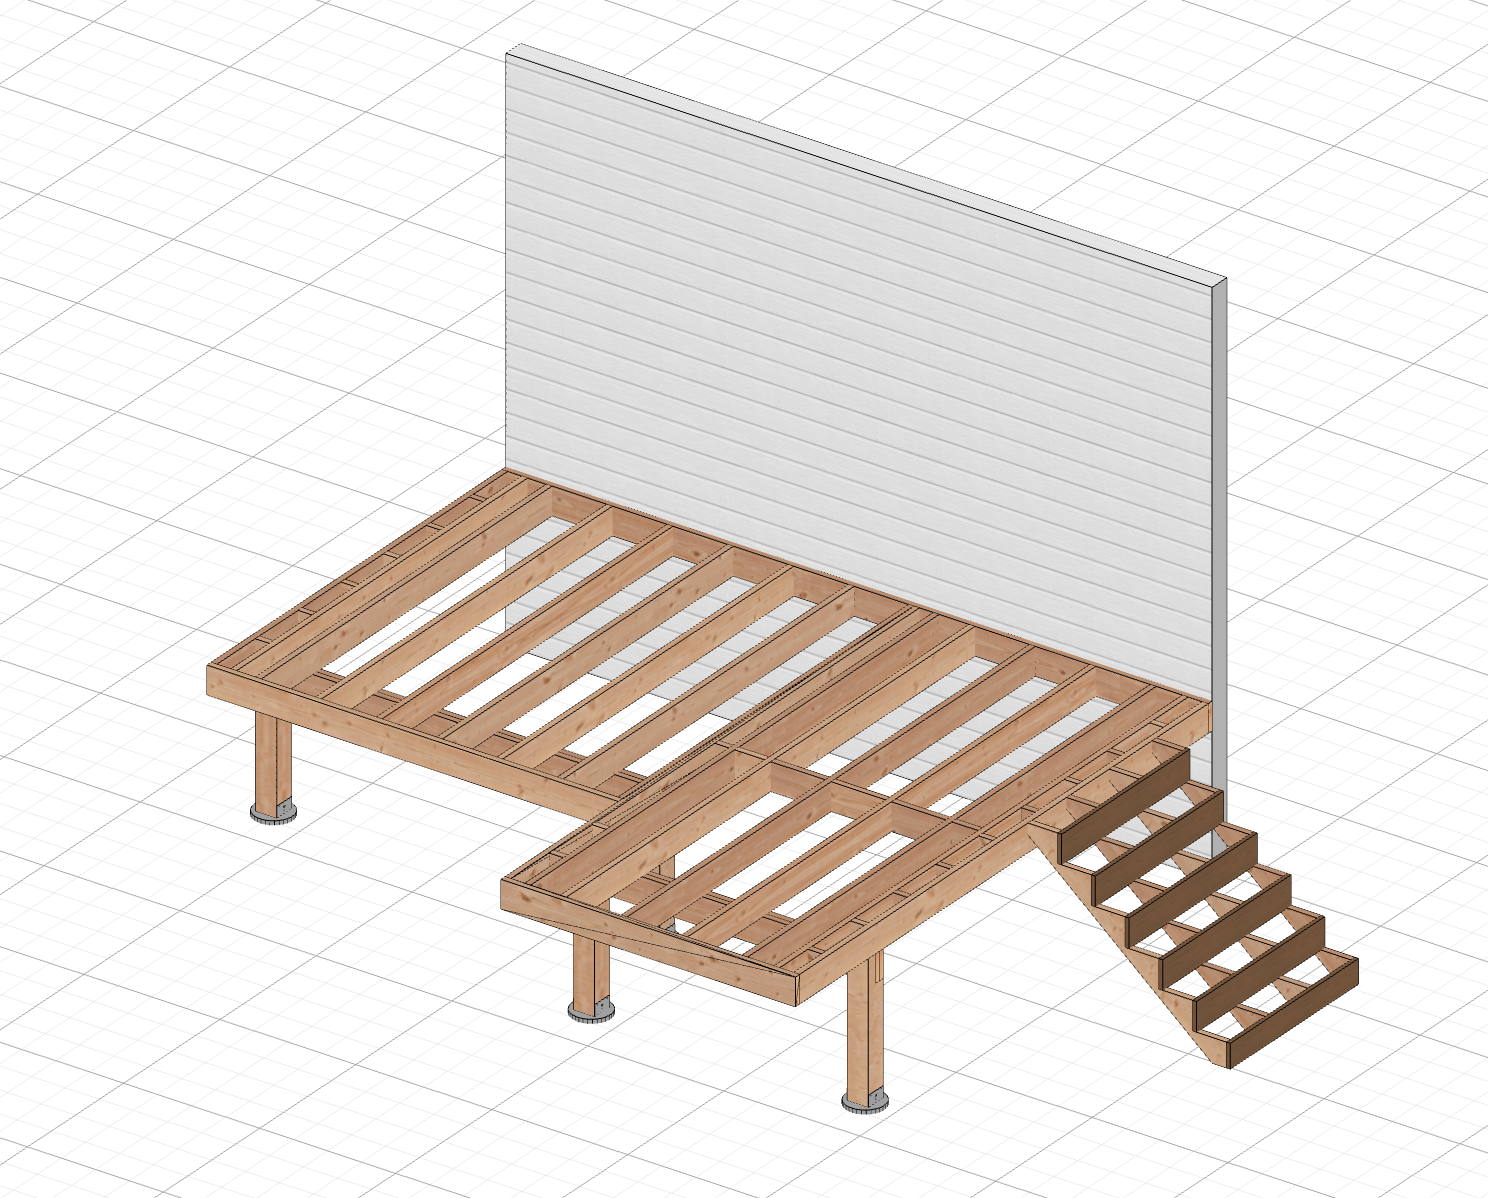
4. Import and Get Organized in SketchUp
Once you've got your file, importing is straightforward:
File > Import and select your DAE file. Double check that the scale imported correctly by measuring a few key dimensions, then verify your units are set properly (feet and inches for most US projects).
Your imported model will be well organized with each structural element as separate, editable groups. Joists grouped within joist systems, beams within beam systems. Clean and ready for enhancement.
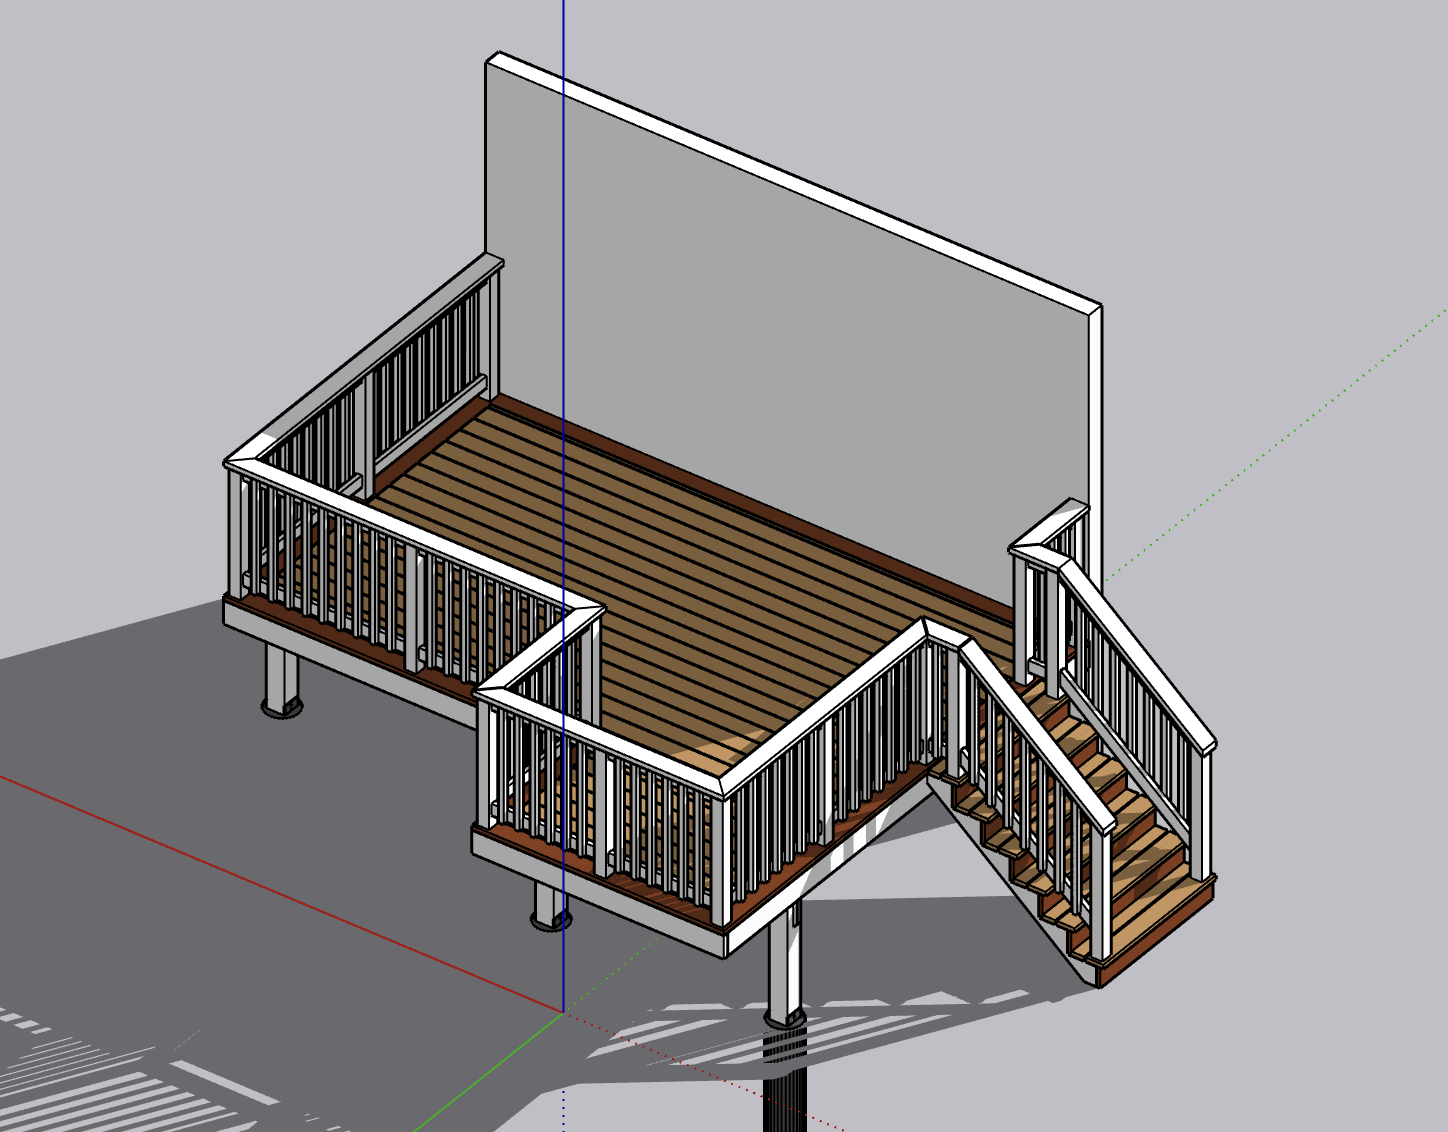
5. Make It Beautiful in SketchUp
Now comes the fun part. With your structure sorted, you can focus on what SketchUp does best:
Visual Polish
Apply realistic wood textures and stains, set up proper lighting and shadows, add surrounding landscape elements, and create multiple viewpoints for client presentations.
Custom Features
Design unique railing patterns, add built-in benches or planters, model deck lighting systems, or create shade structures like pergolas and awnings.
Technical Details
Model specific hardware connections, add flashing details for weatherproofing, or plan electrical routes for outlets and lighting.
6. Create Professional Blueprints with Layout
The RedX Decks app can generate basic construction drawings automatically, but sometimes you need more control. That's where SketchUp Layout shines.
Professional Drawing Setup
Layout gives you proper title blocks, multiple scales for different drawing types, and organized layer management. Create framing plans, elevations, sections, and detailed connection drawings.
Custom Documentation
Unlike the automatic blueprints from RedX Decks, Layout lets you:
- Add custom dimensions positioned exactly where you need them
- Include material callouts with leader lines
- Add construction notes and building code references
- Create coordinated detail bubbles and section markers
- Include any custom text or installation specifications
Best of Both Worlds
Use RedX Decks blueprints for quick reference and basic construction guidance, then enhance with Layout's custom features for permits and detailed contractor communication.
Why This Workflow Actually Works
Time Savings That Matter
RedX Decks creates accurate structure in minutes instead of hours. No more tedious joist by joist modeling or manually calculating lumber quantities.
Better Accuracy
Built-in engineering knowledge ensures proper framing and code compliance. No more worrying about whether your beam sizes are right or if your joist spacing meets code.
Professional Results
High quality 3D presentations for client approval, permit ready blueprints with technical accuracy, and reliable material costs for accurate bidding.
Tips for Success
Before You Start
Get accurate site measurements, research local building requirements, and think about future expansion possibilities. A little planning upfront saves major headaches later.
During the Process
Always verify your imported model accuracy in SketchUp. Keep your RedX Decks and SketchUp files organized and backed up. Trust me on this one.
The Bottom Line
This workflow changes how you approach deck design and documentation. By letting RedX Decks app handle the complex structural stuff and using SketchUp for visualization and customization, you can create professional deck designs faster and more accurately than trying to do everything manually.
Whether you're new to 3D modeling, looking to streamline your design process, or planning your dream deck project, this approach gives you the best of both worlds: engineering accuracy and design flexibility.
The result? Deck designs that look great and actually work in the real world.